
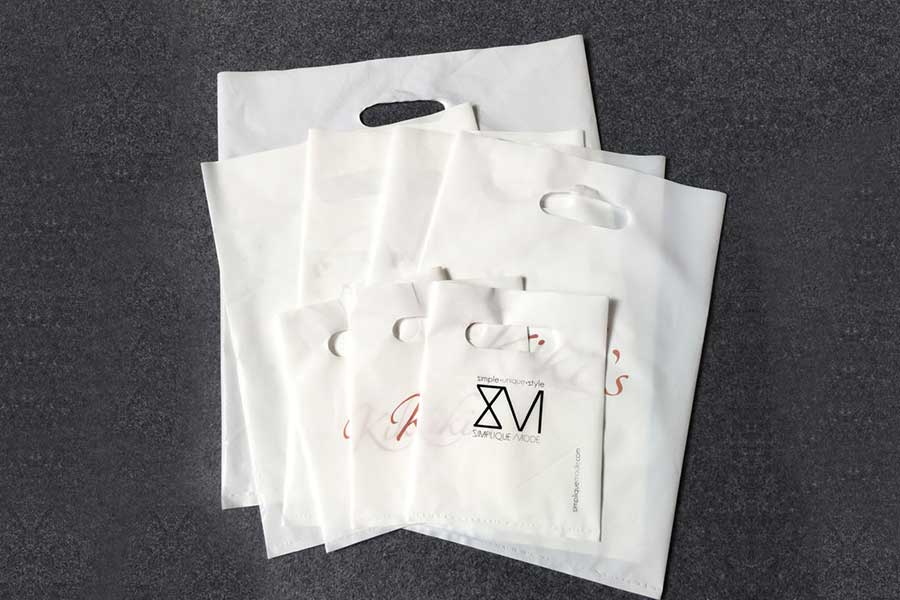
A die-cut handle bag needs two related specifications: the space available for the goods and the shape through which the customer carries them. Total outside height cannot describe both. Put the usable body, handle opening, folds and seal on one drawing, then check the proposed bag with the actual retail pack.
This matters when a buyer compares quotations for bags that look similar in a catalogue. One may have a lower hand opening, a different gusset or less room below the handles. A quoted width and height can match while the packing and carrying experience differs. The specification should make those differences visible before the samples are treated as equivalent.
Begin with the retail pack and its carrying task
Prepare the goods as the customer will receive them. Include the product carton, wrap, inserts and any other item normally put in the same bag. Measure the completed purchase pack and note rigid corners or projections that may contact the film. Keep a photograph of the arrangement with the measurements.
Describe the expected carrying sequence. A purchase carried from a checkout to a nearby vehicle is a different handling brief from a pack repeatedly lifted during a longer visit. The actual sequence helps determine what to observe during sampling without inventing a universal carrying-weight requirement.
List the intended order configurations. A folded garment, a boxed gift and several smaller retail items can place different demands on the same outer bag. If one bag is expected to cover them all, include the limiting configurations in the trial. Where a separate size is needed, make that exception part of the buying brief.
Keep presentation requirements identifiable too. The goods may need to sit below the opening, remain partly visible or be covered by another piece of packaging. State the requirement rather than assuming the supplier will infer it from a reference photograph of an empty bag.
Draw the usable body separately from the outside outline
Measure the finished bag flat without pulling it into shape. Mark total height from the top edge to the finished bottom. Then show the bottom seal and the space below the hand opening that can accommodate the purchase pack. Name the endpoints of every measurement.
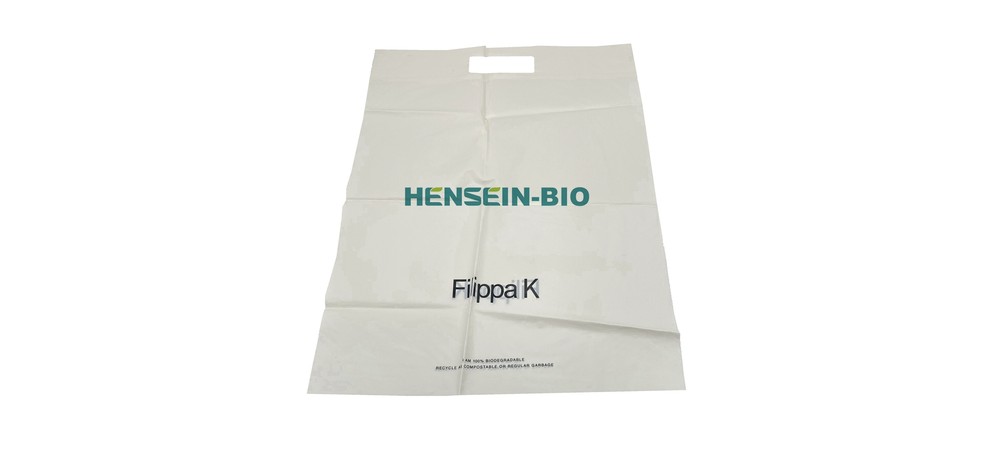
The HENSEIN-BIO custom logo die-cut handle bag shows the type of format concerned. Treat its product image as a construction reference. A current order still needs a drawing that identifies the proposed dimensions and usable space.
For an ungusseted bag, the flat width is a useful reference but does not describe the filled package's depth. If gussets are present, show whether the width describes the folded face or the expanded construction. Distinguish a side gusset from a bottom gusset instead of listing an unexplained third dimension.
Do not assign the complete outside height to the contents. The handle area, the bottom seal and any closing or presentation space affect where the goods can sit. Check the filled sample to determine whether the intended body space remains available when the bag takes the shape of the pack.
An illustrative drawing might describe an outside height of 360 mm and a usable body height of 260 mm below the handle area. Those figures explain two different measurements; they are not a HENSEIN-BIO stock specification or a recommended allowance. The actual relationship depends on the handle location and construction being evaluated.
Make the handle opening a defined feature
Show the opening's width and height, its position below the top edge and the shape of its ends. Identify the material remaining above the opening and beside it. If a supplier uses a drawing of the cutting tool or another controlled reference, connect that reference to the bag drawing.
Include any reinforcement requirement explicitly. A die-cut opening does not, by itself, tell a buyer whether the handle area has an additional layer or another construction feature. If two quotations differ on reinforcement, retain that distinction in the comparison rather than treating both as the same bag with different prices.
Try the handle with the intended purchase pack inside. Check whether the hand can enter comfortably, whether the opening changes shape under the load and whether the user's grip causes the goods to press into the upper body. Observe the cut edge and the surrounding film after carrying.
Include relevant hand sizes in the trial. If gloves are normally worn when handling the packed bag, consider them in the grip assessment. Do not approve comfort based only on one person's empty-bag demonstration, and do not turn a small trial into a claim that the handle suits every user.
Keep appearance and handling observations separate. An opening can look symmetrical on the flat bag while feeling awkward with a rigid carton inside. Conversely, an opening that carries the sample comfortably may place the printed logo in an unattractive position. The drawing should let the team change the relevant feature deliberately.
Build a trial around the goods, not a free-hanging weight
Use the representative retail pack for the application trial. A compact test weight can load a bag differently from a box with corners or several items that settle into a wider base. If a separate loading screen is required, describe its purpose and conditions rather than substituting it silently for the real packing task.
Run the sequence from opening and filling through lifting, carrying and setting down. Observe whether the pack enters without forcing the bag mouth or stretching the film over corners. Note where the goods settle and whether they remain below the opening during normal carrying.
Inspect after each relevant stage. Look at the cutout, the film around it, the body where it meets product edges and the bottom seal. A failure near the handle can involve a cut-edge issue, a tight fit or an unsuitable complete construction. Record the location and circumstances before prescribing a change.
If the supplier provides a film-strength result, keep it attached to the material evidence rather than using it as a finished-bag carrying rating. ASTM D882 concerns tensile properties of thin plastic sheeting. A material specimen result and a filled die-cut bag handled by a customer address different configurations.
Agree the practical acceptance criteria for the intended task. Describe the failure or difficulty the buyer considers unacceptable, how it will be observed and which sample references are covered. Avoid borrowing a passing load from another bag type with a different handle, film and body shape.
When a larger body changes the carrying result
Increasing bag width may improve insertion, but it can also let the goods move into a different position. Increasing height may leave more space above the contents while changing the relationship between the pack and the grip. Repeat the handling sequence after a dimensional change so an improvement at the packing bench is not assumed to settle the carrying task.
If the product pack changes, revisit the approved case. A revised carton, a promotional insert or an added item can introduce a different edge or shift the load. Keep the approved bag drawing tied to the purchase configurations it was actually checked with.
Place artwork around the working handle and folds
Reserve the main printed area on the bag drawing after the handle geometry is clear. Show whether the design appears on one or both faces and whether any element crosses a fold. Confirm the printable area with the supplier or printer for the proposed construction.
Check a filled sample or appropriate proof when reviewing placement. The hand can cover text near the opening, and a rigid object can distort an otherwise centred logo. Put information that customers need to read in an area that remains accessible during the intended use.
Identify the film background with the artwork. A design prepared on white paper may appear differently on the proposed bag. Agree how appearance will be reviewed on the actual construction; a digital colour reference alone does not approve the finished printed result.
Environmental wording and certification marks require their own supporting scope and permission checks. Keep those references with the artwork file. An approved handle drawing says nothing about whether a particular claim or mark is authorised for the printed finished bag.
Where the design changes to improve carrying or packing, check the artwork again. Moving the opening or changing a gusset can shift the space available for graphics. Make the relationship visible in the revision record rather than letting the drawing and artwork develop independently.
Assemble a specification that another buyer can compare
The purchasing file should let someone distinguish the approved construction from a visually similar alternative. The following fields can be completed from the drawing, the sample and the agreed packing arrangement.
| Specification area | Fields to define |
|---|---|
| Intended goods | Packed dimensions, relevant edges and purchase configurations |
| Bag body | Flat width, total height, usable body dimensions and measurement endpoints |
| Folds and seal | Gusset type and dimensions, bottom seal position and construction reference |
| Handle | Opening shape, dimensions, position and any reinforcement |
| Film | Material description and single-wall thickness information for comparison |
| Artwork | File revision, printed faces, area, colours and approved wording |
| Packing | Individual bags per inner pack, inner packs per carton and total bag count |
| Approval | Sample reference, trial conditions, observations and authorised drawing revision |
Ask how dimensional tolerances will be checked and agree the relevant limits. A sample that only just accommodates the pack at nominal dimensions needs closer attention at the smaller usable boundary. Do not assume the tolerance from an earlier carrier-bag order applies to the new construction.
Keep pack counts explicit when comparing prices. A bundle, an inner pack and a carton are different units, and a quotation can look cheaper simply because it contains fewer bags. If retail packaging or inserts are required, identify them separately from the bag-body specification.
Use sample labels that survive the approval process. A product code, drawing revision and sample reference give the team a practical way to connect photographs, artwork and later deliveries. Keep a retained sample protected under the supplied storage conditions so it remains useful as a comparison reference.
Decide what must be resampled
Request another sample when the proposed change could affect the task that failed. Moving the hand opening, changing reinforcement or altering the body dimensions calls for another packing and carrying check. A purely graphic correction may require a different scope of review, provided the construction truly remains unchanged.
Where several fields change together, identify the result as a new complete design. Avoid attributing an improvement to a thicker film when the opening position and usable body have changed as well. The approval should name the finished bag that works for the intended goods and conditions.
The die-cut handle bag range provides formats for an initial discussion. Send HENSEIN-BIO your handle-bag drawing and retail pack brief, including the usable body requirements, opening geometry, relevant product edges, artwork and pack counts. Those inputs make a sample or quotation discussion specific enough to compare with the bag your operation actually needs.